
- Make sure Microsoft Word is up-to-date
- Make sure that Adobe Acrobat Pro is up-to-date
- Download PAC 2024 (external website)
An example file, Word-un-accessible.docx (DOCX 126KB), has been created which has issues that need to be corrected.
Title, Author etc.
- While Title is the only field that is required, it is worth adding Tags for SEO, Subject, and right click on Author(s)’s name to “Remove Person” if you do not wish their name all over the internet – replace Author with organisation name
Headings
Use the headings built into Microsoft Word
The page content should be outlined in the headings, which helps AT users comprehend the page layout and navigate to interesting content:
- Main heading = Heading 1
- Sub-headings = Heading 2
- Sub-sub-headings = Heading 3 etc.
Lists
Use the inbuilt document list controls within Microsoft Word to add ordered lists (numbers) and unordered lists (bullet points)
AT users can understand lists created as lists because of the way content is organised
Lists will communicate helpful information such as:
- How many items the list has
- Where the list starts and where the list finishes
- Which list item the user is on
Hyperlinks
- The destination of links should be communicated accurately and clearly
- Use URL shortening services such as Bitly (external website) or TinyURL (external website) if the document is to be printed, if not, make sure the link text is meaningful (link shorteners can be viewed as a security risk as the destination cannot be seen unless the link has been clicked!)
- Screen readers will generally provide a list of links so make sure the link text is meaningful
- Do not use “click here” or “more information” for all the link text because it will not be possible to distinguish the links from each other
Alternative text for images (alt text)
- Alt text is used to convey the content of the image to those who can’t see it
- Screen readers will declare the image, then read the alt text
- Images that have no informative content and are purely decorative do not require alt text, but may require markup so that Assistive Technology understands that they should be ignored
- Remember to avoid punctuation as it is voiced
- MakeThingsAccessible has a guide to creating meaningful alternative text
Image use
- Only use images that support the text of the document
- Try avoiding the use of an image instead of text
- Make sure images have alt text unless they are decorative
Language
Leading screen reader software is multilingual.
Language of document
The language of the document must be set so that screen readers will read the document using the correct language profile.
Language of part of document
Content within the document written in a different language to the document’s default language must be identified.
Tables
- Do not use tables to control layout
- Use tables to communicate relationships between data
- Make sure headers are identified
- For WORD only - Provide a short descriptive caption for the table using Table Properties -> Alt Text
- Try to keep the table simple
- If the table is complicated, can it be split into multiple tables or into lists?
Plain English
- Make sure sentences are short and concise, around 20-25 words
- Make sure words are kept simple
- Use common words. Complicated longer words (8 or 9 letters) will cause readers to skip shorter words (3,4, or 5 letters) that follow
- Use an Active voice rather than a Passive voice
- Where possible, use words containing one to two syllables
- Aim the language used at the level of a 9 year old as recommended by GOV.UK (external website) – remember in the UK, 7.1 million adults read at, or below, the level of an average 9 year old. WCAG 3.15 Reading Level (AAA) (external website) recommends providing a simplified version of the text if it requires a reading age of more than 12 years old
- Use contractions, words made up of two short words joined with an apostrophe such as I’ve, can’t etc.
- Do not use double negatives
- Explain the unusual, to help give full information
Why use it?
- The use of Plain English helps all users, including those who’s English is not their main language, and those who have cognitive impairment
- If the content is easy to read, it will be easy to understand when converted into alternative formats such as braille, or being read aloud by a screen reader
- Clear content converts more easily into British Sign Language
Further help
- Free services, guides, and resources to help are available from the Plain English Campaign (external website)
- Measure the readability of the text using Hemingway Editor (external website)
Font
- Use a font that is “sans-serif” and clear such as Arial, Helvetica, or Verdana
- Minimum font-size of 12
- For continuous text, avoid using capitals - letters in lowercase are read more easily
- Do not use underlining and italics because they could make text harder to read
- Bold and large font can be helpful when emphasising and highlighting text
- Make sure that text is justified to the left, as this helps to make sure there is an even gap between words, and enables the start and end of each line to be found easily
Colour
- Do NOT use colour by itself to show meaning
- Make sure that there is adequate contrast between background and text – use TPGi’s Colour Contrast Analyzer (CCA) (external website) to check contrast
Accessibility Checker (external website) tests Microsoft Word documents for accessibility issues and gives errors, warnings, tips, and intelligent services.
Errors
- All non-text content has alternative text (alt text)
- Tables specify column header information
- All sections have meaningful names
- Image or object is inline with the text
- Document access is not restricted
- All content control fields have titles
Warnings
- Table has a simple structure
- Sufficient contrast between text and background
Tips
- Layout tables are structured for easy navigation
- Documents use heading styles
Intelligent Services
Suggested alternative text.
Review menu -> Check Accessibility
The errors reported are:
- Missing Object Description (1)
- Missing Table Header (1)
- Image or Object Not Inline (1)
The Warnings reported are:
- Use of Merged or Split Cells (2)
- Hard-to-Read Text Contrast (1)
Intelligent Services:
- Review Auto-Generated Description (2)
Setting up Word to make accessible documents
Make sure that Hidden Characters

are turned on the Home tab (Paragraph section) and the Display Styles pane

Display Navigation pane (on View)


Outline and Style levels
Use Word’s Heading styles to style the headings consistently.
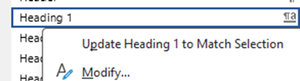
If a Title tag which is not set as a heading but is required to be a Level 1 heading

click on the down arrow
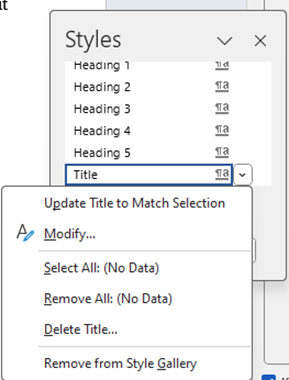
choose Modify
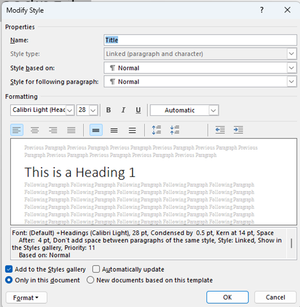
Choose Format
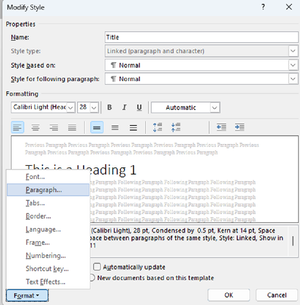
and go to the paragraph tab
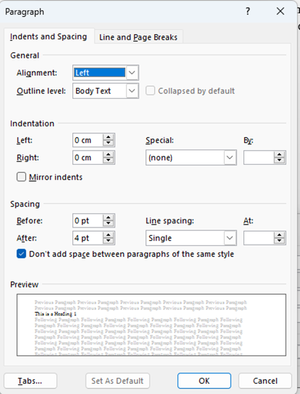
Amend “Outline level” from “Body Text” to “Level 1”
A hard return causes each line to become separate
<h1>tags!
To fix this, delete the hard Return, right click and choose Paragraph
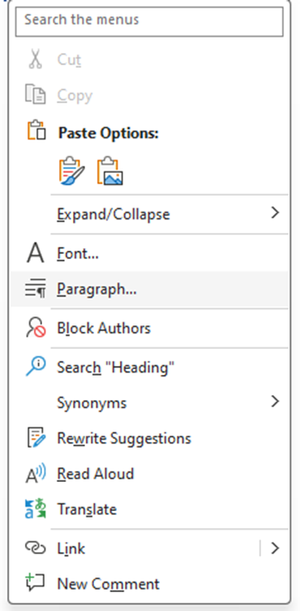
increase Right indent so that the paragraph will wrap correctly but only with the one
<h1>tagMake sure headings are in a sequential order, and do not miss levels
Start with doing some things that aren’t checked for errors.


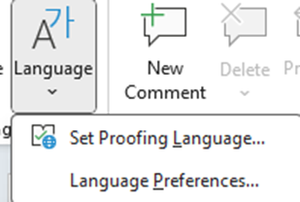
Language
Language of document
Review -> Language -> Set Proofing Language

Note: it is set for the current document
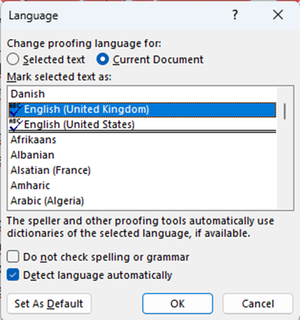

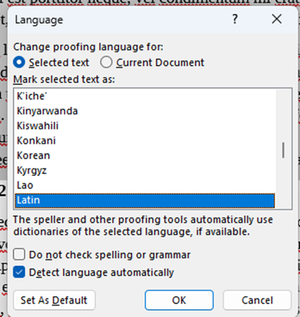
Language of part of document
Select text to be a different language
Review -> Language -> Set Proofing Language
Note: it is set for the current document

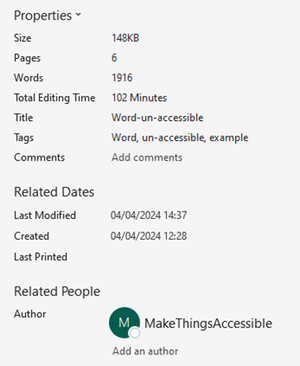
Title
To add the Title, File menu -> Info and click into the Title in the Properties section

Copy the contents of the Title into the Subject field
Add applicable SEO keywords into Tags field
Delete Author and replace with generic author such as organisation name
Hyperlinks
To add a hyperlink, select the text that defines the hyperlink, right click and select Link, and choose the applicable type of Link
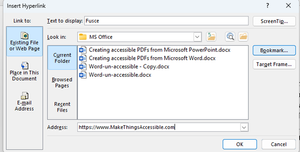
A ScreenTip can also be added by clicking on the “ScreenTop…” button so that text can be added that explains what clicking the link does
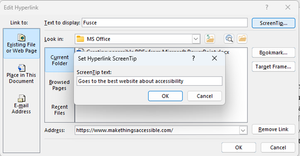
Where the url link text is a full url

Right click and “Edit Hyperlink…” and change the “Text to Display” to text that is not the text of the url of the hyperlink
Adobe Acrobat will automatically make text that appears to be a hyperlink clickable as a hyperlink without it being a proper hyperlink in the PDF document so text like below

will be clickable in the exported PDF and should be made into a hyperlink in the original document using good link text

Footnotes and Endnotes
Footnotes and endnote works in the same way but footnotes appear at the bottom of the page, and endnotes appear at end of document
Click where the link to the footnote is to go and click on the References tab
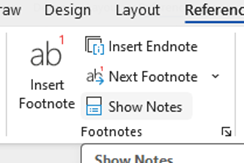
Click “Insert Footnote” and Word adds reference, then creates area to add text of footnote. Inserting endnotes is done using the “Insert Endnote”. Footnotes and endnotes can be styled

To fix the errors in the Inspection Results, select the down arrow by each item and follow the Recommended Actions.

Missing Object Description
The error reported is “Missing Object Description” because the image does not have alt text set or is not marked as decorative.

Click on Add a description
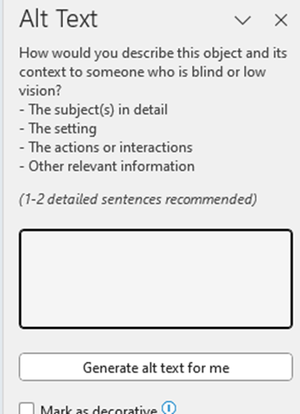
The fields are used as follows:
- Alt Text: used to enter a short description of the essential details of the selected object, and is available to be used by assistive technologies
- Decorative: marks the object as purely decorative and is ignored by assistive technologies
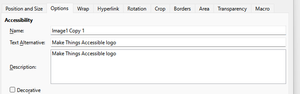
The Alt Text and Decorative options are also available by selecting the image, Right Click -> View Alt Text…
The alt-text “Make things accessible logo” was added

Note: the exported PDF failed on the logo in the Header not having alt-text so make sure that both Text Alternative and Description fields are filled.
Missing Table Header
The error reported is “Missing Table Header” because the top row is not set to a header.
Select "first row as header"

Image or Object Not Inline
The error reported is “Image or Object Not Inline” because the image is not inline with the text.
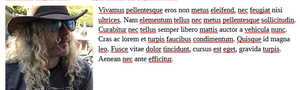
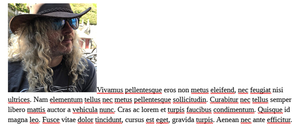
Either “Place this inline” with the text or mark as decorative, in this case the image has placed inline with the text – note how the image placement has changed.
If the image had been marked as decorative, the number of Auto-Generated Descriptions that would require reviewing would have been reduced by one.
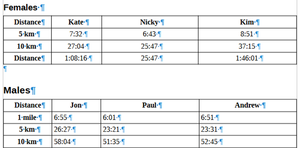
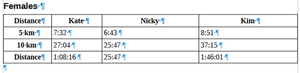
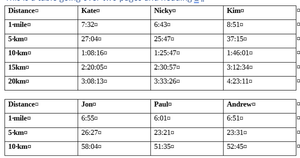
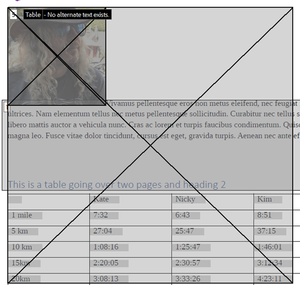
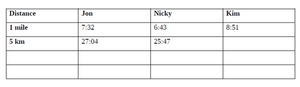
Use of Merged or Split Cells
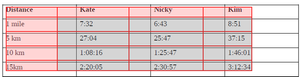
The warning is because of the first cell which covers two rows

And

The best way to fix this warning would be to split the table into two, one for the females and one for the males.
Note: This problem can also be sorted out in the exported PDF using Adobe Acrobat Pro but setting sub-headings in Adobe Acrobat Pro are time consuming to do
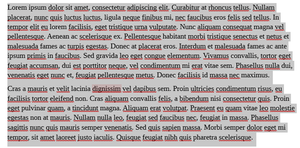
Hard-to-Read Text Contrast
This warning is because of the colour contrast between the text and the background.
To fix this, select the text and change the text colour.
Review Auto-Generated Description
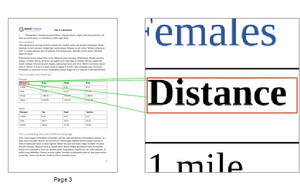
Verify description or mark as decorative, the first image is going to be marked as decorative, and and the second image is going to have the alt text verified. The Alt Text says:
“A person with long curly hair wearing a cowboy hat and sunglasses
Description automatically generated”
As this is acceptable, delete the “Description automatically generated”
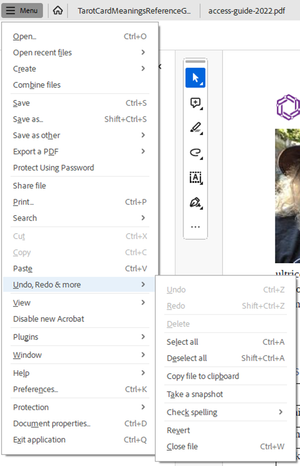
Automatic Alt Text can be turned off or on by going to File menu and selecting Options (which is at the bottom)

Select
And checking or un-checking


Tables
Setting headings in tables
Inserting a table
Insert menu -> Tablemenu
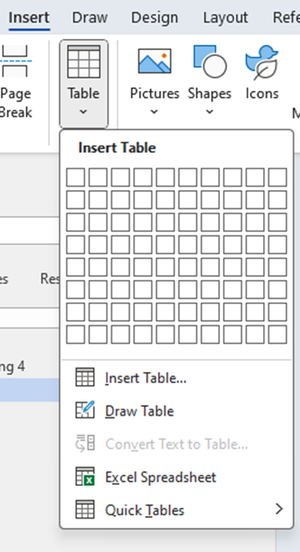
Select the number of rows and columns
To set the headings, right-click in the table and select

and make sure

is checked
Click into the

Make sure that Header Row is checked
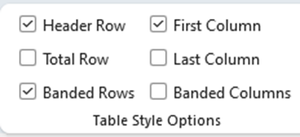
Header Row makes the first row a header, First Column makes the first column a header
To add column headings, click into first cell of the top row and write the heading, then tab into the other columns and add as required


| First Heading | Second Heading | Third Heading |
|---|---|---|
Editing a table
Make sure that
is available
Right click and choose


Repeating heading when table splits across pages
Right click on table and choose Table Properties, make sure
is checked
To allow the table to split across pages and columns, make sure that

is checked

Avoid newlines to create space
Make sure that “Formatting Marks” are visible by going to Home and clicking
Females table with newline character after it. NOTE do not delete the newline character between tables before the following is done because the tables become merged
Right click in table, select Table Properties… and in Text wrapping, select Around, then click on Positioning, and amend in the Distance from surrounding text, the Bottom value
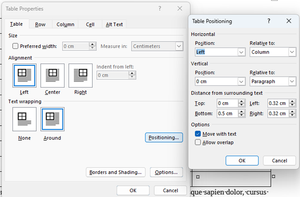
The newline character can now be deleted
If a space needs to be added back for example to put a Heading in, click in the last cell, use the keyboard shortcut Ctrl+Shift+Enter to Split Table, and the newline character will be put inbetween the tables. A new row can be created at the bottom of the original table, the content pasted in from the new table, and the new table deleted
Avoid using empty table cells for formatting

Tables with empty cells
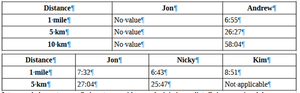
There must never be blank heading cells so add an applicable title to the column heading, even if WCAG does allow for the first cell A1 to be blank (external website)

Different screen readers will announce empty cells in different ways (external website) so the best solutions are to use “Not applicable” or “No value”
Paragraphs
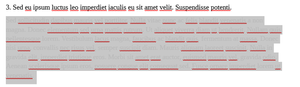
Avoid newlines to create space
Make sure that “Formatting Marks” are visible by selecting View menu, Formatting Marks (or Ctrl + F10)
Delete unneeded newlines


Footnotes and Endnotes
Footnotes and Endnotes can be correctly defined and made accessible using Adobe Acrobat Pro but to get the Accessibility Check to pass footnotes and end notes must be put inline.
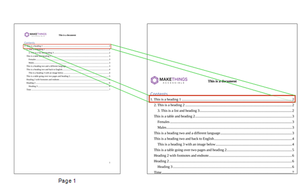
Creating a table of contents or TOC
References tab, Table of Contents
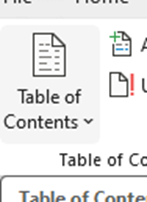
Choose to automatically build TOC or a customized TOC
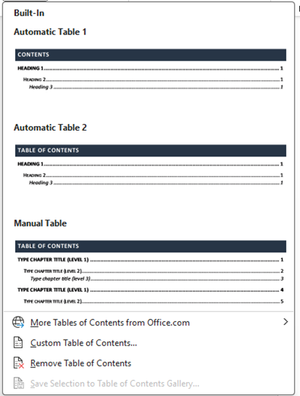
Because heading styles have been applied, Word uses them to create TOC

Artifacting objects
- Artifacting objects stops the screen reader from voicing them
- The Header and Footer feature in Word stops AT reading out content in the header and footer
Adding bookmarks
- Click Save as PDF then “More options”, then click on Options then “Create bookmarks using Headings” – Note: Word bookmarks can be created manually but that takes time and effort
- Alternative if Adobe Acrobat Pro is installed on the PC, in Word, click on Acrobat PDFMaker, Preferences, Bookmarks and check Convert Word Headings to Bookmarks. Note: Headings 1-6 only get tagged because PDFs do not have heading 7 etc.
- Save as PDF with the following options are selected (Create Bookmarks from Headings, Document properties, and Document Structure tags for accessibility), or
- Or if Adobe Acrobat Pro is installed, use the Acrobat tools in ribbon of Word
- In Preferences, make select Convert Document Information, Create Bookmarks, Add Links, Enable Accessibility and Reflow with tagged Adobe PDF
Note: "Save as PDF” doesn’t add a<P>tag into each table row within the table that has the paths that make up the cell border, whereas Acrobat tools add a<P>tag into each table row within the table that has the paths that make up the cell border. The<P>tag into each table row within the table that has the paths that make up the cell border, requires artifaction in Adobe Acrobat Pro once the file is exported.
Header and Footer objects are artifacted when exported to PDF.
- Fonts error can occur due to Word not embedding fonts when using “Save as” to create the PDF
- If “Initial View Show Document Title” is not selected in PDF, “Check for accessibility” when run in Adobe Acrobat Pro is likely to fail the Title
- When PDFMaker puts
<P>tags into tables, in Adobe Acrobat Pro Artifact the contents of the<P>tag - click on<P>tag, click “Edit” Role Map, which maps artifact to<P>tag, delete item, rename<Artifact>to<H1>then select “Path” and Change Tag to Artifact so it is artifacted, delete tag - If a Table splits over more than one page it will be a separate table on each page, fix this in Adobe Acrobat Pro by moving the rows on the second Table into the main table and then deleting the empty table. The other option is to change the table in Word so it doesn’t onto a second page
- “Walk” the Tag Tree by clicking on the first item in the tree, then using the down arrow key (and right arrow key to open the tag where applicable, list etc.) so that the order the PDF is read can be checked
- In this case everything is good but if it is not, the tags will need to be rearranged into the correct order
- Click on “All tools” menu, “Prepare for accessibility” and choose “Check for accessibility” and “Start Checking”
- The document has two issues, Logical Reading Order and Color contrast both need a manual check
Open PAC 2024 (external website) and drag and drop the PDF file onto

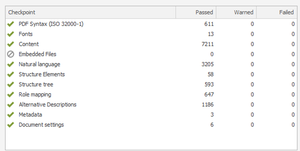
The test will run and errors will be reported
Click on “Results in Detail” button which opens up
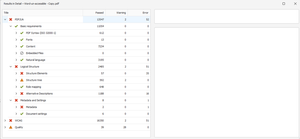
and drill down to the warnings
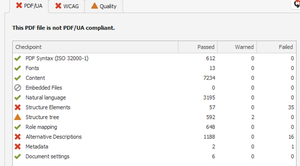
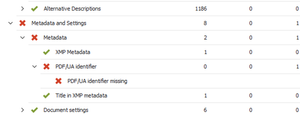
There is one error for bounding boxes on a Figure, and 34 errors for “Table header cell as no associated sub cells”, one error for PDF/UA identifier missing, one warning for ‘Invalid use of a “TBody” structure element‘, and one warning for ‘Possibly inappropriate use of a "Figure" structure element’
There are 16 errors for “Alternative description missing for an annotation”
There is 1 error for PDF/UA identifier missing

Fixing these issues
- Open file in Adobe Acrobat Pro
- Make sure that the file is saved at this point
- It is worth making various versions in case a change doesn’t allow rollback!
Removing empty <P> tags
Note – empty returns in Word become empty
<P>tags in Adobe Acrobat (do not use them in Word, use Space Before and Space After feature in Word to achieve vertical spacing)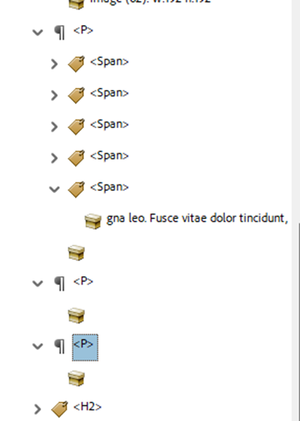
Artifact empty tags by selecting tag, right clicking and choosing “Change Tag to Artifact”

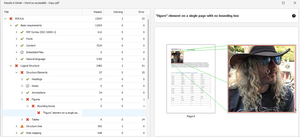
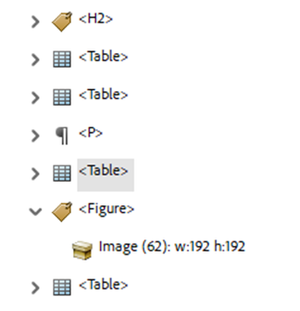
Figure element on a single page with no bounding box

Need to add bounding box find Figure tag (select the text next to the image, and “Find Tag from Selection” in the Accessibility tags … menu)
Right click on Figure tag and select Properties
Copy Alt-Text (“A person with long curly hair wearing a cowboy hat and sunglasses”) and put the text somewhere safe
Select the Image tag within the Figure
Right click and “Change Tag to Artifact”
Delete Figure tag
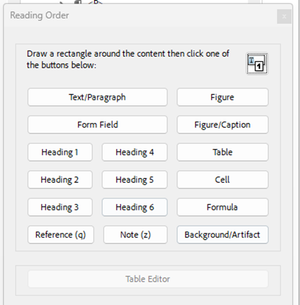
Go to “Prepare for accessibility”, “Fix reading order”
Marquee image

Select Figure in “Reading Order”
If the following strange result happens!
Revert file back to saved version
Go to “Edit a PDF” button


This is something NOT normally done as the tag structure can be broken, and make sure NOT to actually edit any text.
Marquee figure

Right click on
<Image>Copy Alt-Text (“A person with long curly hair wearing a cowboy hat and sunglasses”) and put the text somewhere safeRight click on image, choose Cut (image will disappear), right click choose Paste (image will reappear)
Close Edit mode
There is nothing in the
<Figure>tag for that image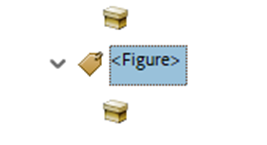
Right click on empty tag and “Change Tag to Artifact”
Delete Figure tag
Go to “Prepare for accessibility”, “Fix reading order”
Marquee image
Select Figure in “Reading Order”
Figure is tagged correctly
The Figure tag is not in the correct place in the structure
And needs to be moved to the correct position
Right click
<Figure>tag and choose Properties and Copy Alt-Text (“A person with long curly hair wearing a cowboy hat and sunglasses”) into Alternate Text for Images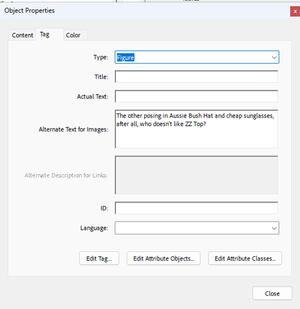
Select “Edit Tag…” button and then open up the first
<Dictionary>object, the BBox attribute has been added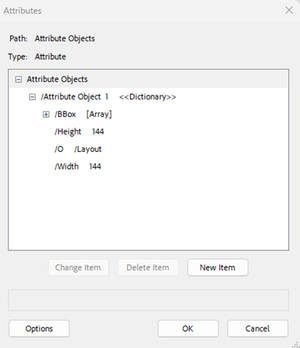
The Block attribute needs to be added, click on first Attribute Object, New Item, Key = Placement, Value = Block
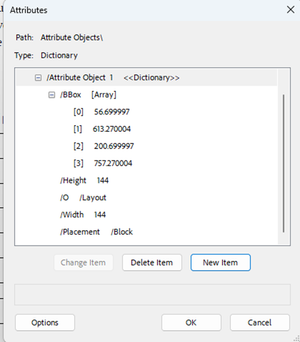
If the Placement attribute is already there, change from Block to Inline (sometimes it might need to be changed TO Block!)


Table header cell has no associated sub cells
All tables require header cells which define the category(s) for the data cells within the table but this is NOT enough, scope needs to be applied too the header cells too. The “Table header cell has no associated sub cells” error occurs due to header cells that do not have the scope attribute applied to them.
For example this table does not have scope applied
Open Table Editor by clicking on “Prepare for accessibility”, “Fix reading order”, select cell in table, and click on “Table Editor” button
The top four cells have been defined as header cells
Click on first header cell, shift + click on each of the other header cells, right click and chose “Table Cell Properties…”
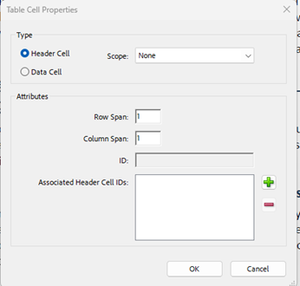
Set Scope to Column and OK
Go through other tables and make sure that the Scope is set appropriately, either Column or Row, and also make sure that any cells that cover more than one column or row have their spans set correctly
In the case of a table with an empty cell
Artifact the empty cell
and delete it
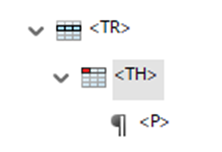
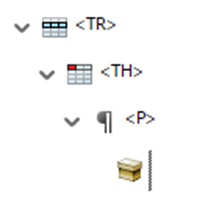
Right click on
<TH>and choose PropertiesChange the
<TH>to a<TD>by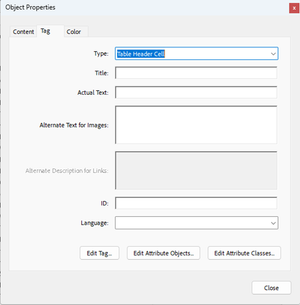
And change from Table Header Cell (
<TH>) to Table Data Cell


Invalid use of a "TBody" structure element

Find the tag in Acrobat Accessibility tags
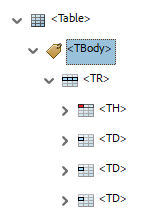
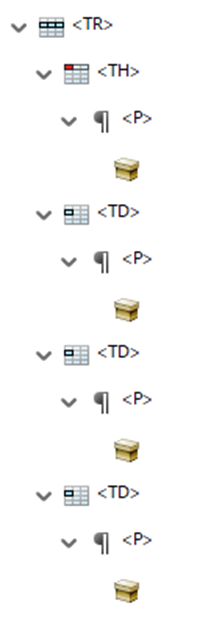
This is happening because Word did not define a row header, and there is no
<THead>. Word automatically made a<TBody>which it not valid without the<THead>Note: the<THead><TBody><TFooter>and are all optional tags, and are not required but if incorrectly used will cause errors to be reportedTo fix, move the rows out of the
<TBody>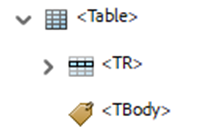
Delete the empty
<TBody>tag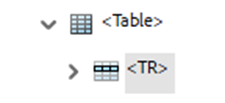


Alternative description missing for an annotation
This error occurs because the PDF/UA standard requires all hyperlinks have alternative text.
These 16 errors are coming from the Table of Contents
When Word generates a Table of Contents (TOC), each item of the TOC is an active link that can be clicked on by a sighted user, or a link that a user of AT can follow
Assuming the TOC contains meaningful text, which it should hopefully have…
Go to the Preflight panel (search for Preflight in “Find text or tools” search in Acrobat
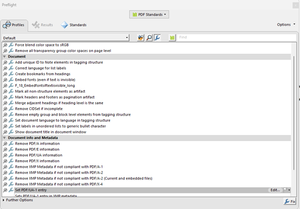
Make sure

is chosen and then click on

Scroll down and under the Interactive elements and properties

The PDF standard wants a contents entry to be added to the link which will provide the alternate text, DO NOT put the alternate text in the Alternate Text field!
Select
and then click on

Save a new version (just to be on the safe side)


If links such as “Click here” were in the text rather than meaningful text, when the “fix” was run, it would technically pass but the text would be wrong and meaningless.
PDF/UA identifier missing
The PDF/UA identifier indicates that the file meets the PDF/UA Standard and this should be done at the end when the file actually is PDF/UA compliant.
Note: this can be added to a file that is NOT compliant but this does not mean that the file will then be compliant.
PAC 2024 gives an PDF/UA identifier missing error
Open the Preflight panel by searching for Preflight in the “Find text or tools” search box
Make sure
is chosen and click on
\
In “Document info and Metadata” select

and click
Save new version of file (just to be on the safe side)
Now there is not any errors in PAC 2024

Creating accessible PDFs from Microsoft Word (Word 2.09MB)
- Accessible Document Basics
- How to handle blank data cells in accessible tables (external website)
- Accessibility Checker and Accessibility Check
- Rules for the Accessibility Checker (external website)
- Improve accessibility with the Accessibility Checker (external website)
- TPGi’s Colour Contrast Analyzer (external website)
- Writing for GOV.UK (external website)
- Plain English Campaign (external website)
- Hemingway Editor (external website)
- WebFX Readability Test (external website)
- Plain English – Advisory eLaHub (external website)
- WCAG 3.15 Reading Level (AAA) (external website)
- Creating meaningful alternative text
- Everything you need to know to write effective alt text (external website)
- PAC 2024 (external website)
- Table Accessibility in Word and PowerPoint (external website)
- Make your Word documents accessible to people with disabilities (external website)
- Creating accessible tables in Microsoft Word (external website)
- Create accessible tables in Word (external website)
- Getting accessible templates for Office (external website)